| During your label design you
will need to specify properties of the
label such as layout, size, paper size,
background parameters, printing options and, if the label will use data
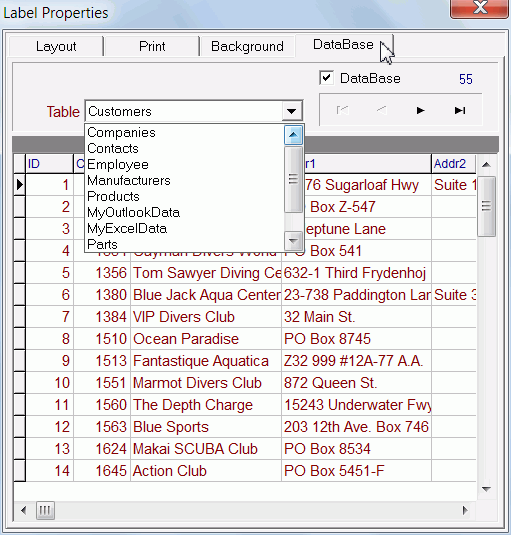
from your
database, select the table to be used as source of the data. Although
you can determine a label's properties at any stage of the design, it
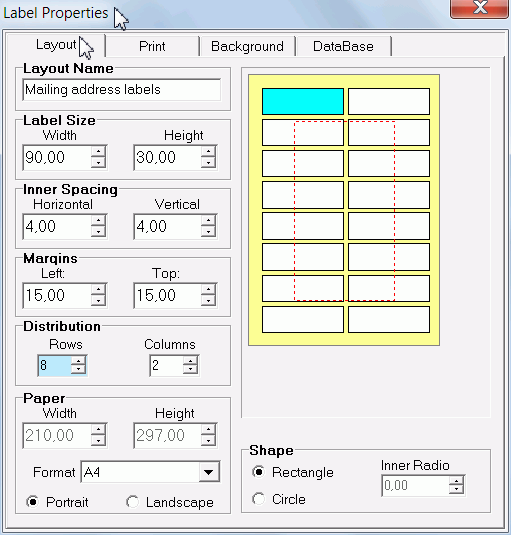
is highly recommended that you do this at the early stage. Also make sure you have set the necessary designer unit of measurements before you proceed to setting label properties. To set the properties of your label, select and click Label Properties to activate a special page consisting of four tabs, namely: |
 |
 |
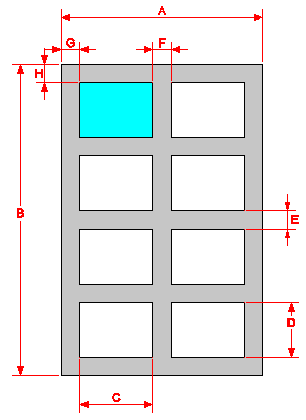  (A) - Paper width. (B) - Paper height. (C) - Single Label width. (D) - Single Label height. (E) - Vertical distance between the labels. (F) - Horizontal distance between the labels. (G) - Layout Left margin (H) - Layout Top margin |
| Parameter | Description |
|---|---|
| Properties Name | Name to identify the properties. Recommended to enter the label name |
| Label Size** | |
| Width | Width of the label (this is the width of a single label on the page) |
| Height | Height of the label (this is the height of a single label on the page) |
| Inner Spacing | |
| Horizontal | Horizontal space between the labels |
| Vertical | Vertical space between the labels |
| Margins | |
| Left | Paper Margin. Enter the left margin. |
| Top | Paper Margin. Enter the top margin. |
| Distribution | |
| Rows | Enter the number of rows on a page. |
| Columns | Enter the number of columns on a page. |
| Paper * | |
| Width | Width of paper |
| Height | Height of paper |
| Format | Predefined list of paper types (formats). After selection, paper size (height and width) is automatically assigned and displayed in the box. If there is no marching paper format in the list, select the Custom option (the last on the list) and then specify the size (height and width). An example of using Custom option is when printing on continuous paper. |
| Portrait/Landscape | Paper Orientation. Select paper orientation: Portrait, Landscape. |
| Label Shape or Type | |
| Rectangle/Cycle | Select label type/shape. If label type/shape is circular (for example, CD labels), then the inner ratio option for the circle will be activated, so you can specify the necessary value. |
| Inner Ratio | If label type/shape is circular, you can indicate radius (curve) of the inner circle. |
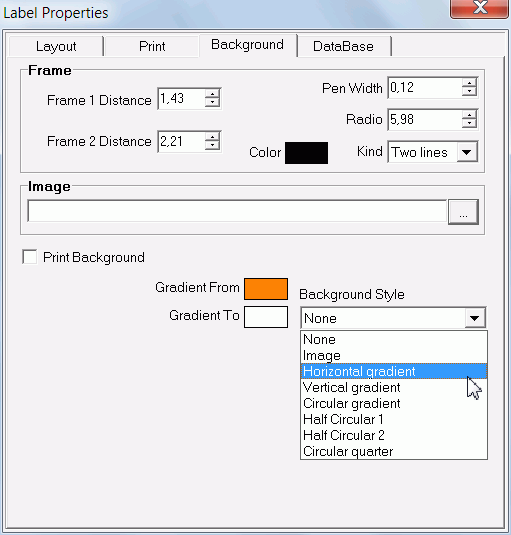 |
 frames, gradient in label background  |
| Parameter | Description |
|---|---|
| Frame | |
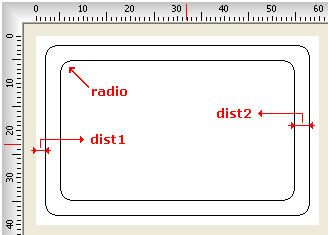
| Frame 1 distance | Distance of the first frame from the label outer edge |
| Frame 2 distance | Distance between the first and second frames |
| Color | Color of the Frame border |
| Pen Width | Thickness of the frame border |
| Radio | Radius (curve) of the frame(s). Radio enables you to have frame(s) with or without round corners. |
| Kind | No frame, Single (one line) or double (two lines) frame options. |
| Image | |
| Image | If necessary, click to load image to be used for the label background |
| Other parameters | |
| Print Background | Check (tick, mark, select) if you want to print the label along with the background color or image. |
| Gradient From | Start color of gradient background (effective if background style is not None) |
| Gradient To | End color of gradient background (effective if background style is not None) |
| Background Style | Background style. Select one of
the eight options: None, Image, Horizontal gradient, Vertical gradient,
Circular gradient, Half Circular 1, Half Circular 2, Circular quarter. Circular gradient, Half Circular 1, Half Circular 2 and Circular quarter - effective only if label type/shape is circular (for example, CD labels) in the Layout parameters. |
 Background style : None |
 Background style : image |
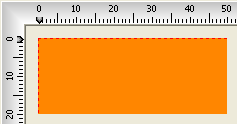
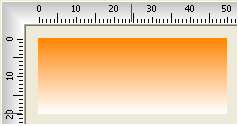 Background style : Horizontal gradient |
| |
|
|
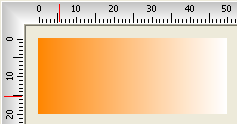 Background style : Vertical gradient |
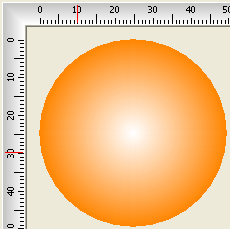 Background style : Circular gradient |
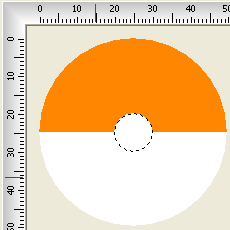 Background style : Half Circular 1 |
| |
|
|
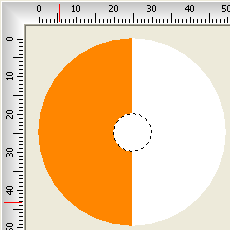 Background style : Half Circular 2 |
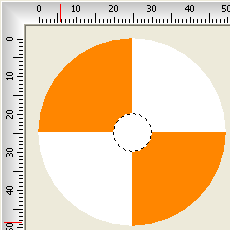 Background style : Circular quarter |
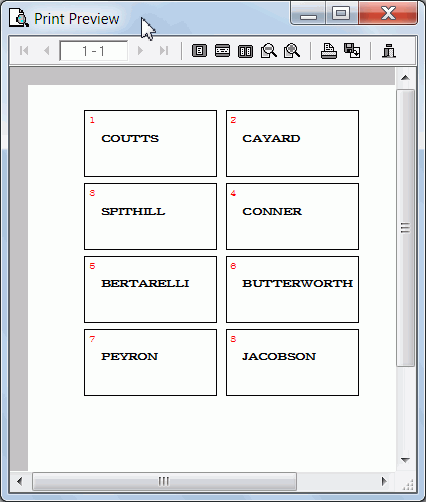
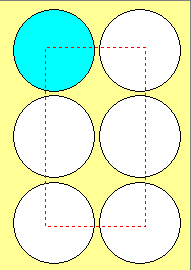
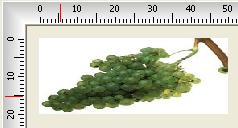
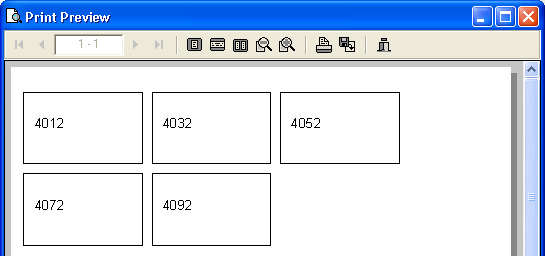
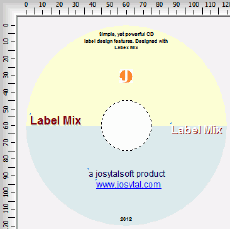 practical example |
 |
 |
| Parameter | Description |
|---|---|
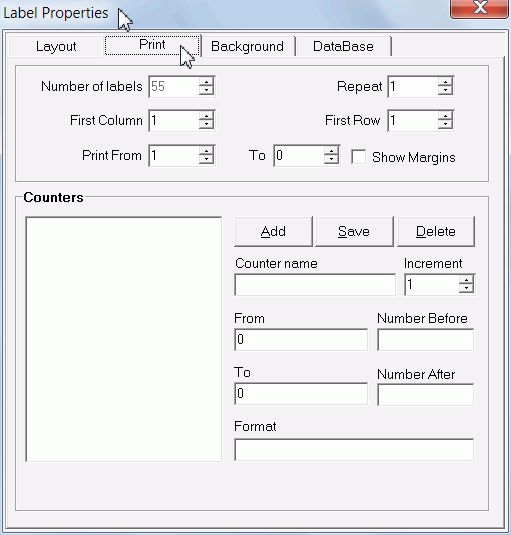
| Number of Labels | number of labels to print. If the label is linked to a database table, then this number will be the number of rows in the table. Each row represents a label. |
| Repeat | number of times to print each label |
| First Column | Column of the first label to be printed on the first page. |
| First Row | Row of the first label to be printed on the first page. The intersection of First Row and First Column determines the position of the first label to be printed on the first page. This parameter can also be set in the Layout properties by simply selecting the label. |
| Print From | Start of the range of records
(labels) to be printed. Only effective if the label extracts its data database table, since each record or row will represent a label |
| To | End of the range of records
(labels) to be printed. Only effective if the label extracts its data database table, since each record or row will represent a label. |
| Show Margins | Check (tick, mark, select) to show printer margins specified in the Layout properties |
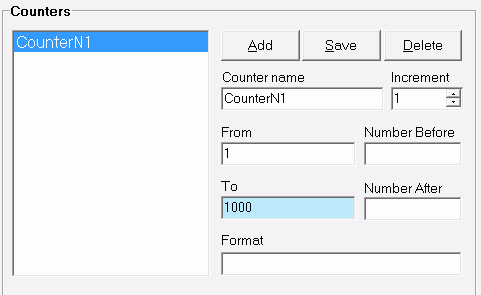
| Counters | |
| Counter Name | Name to identify the counter |
| Increment | Increment value (step) |
| From | Initial value of the counter |
| To | Final value of the counter |
| Number Before | Number (if any) to append before each sequence |
| Number After | Number (if any) to append after each sequence |
| Format | Format of the result. You can
format the final result with '#' or '0' see what is format |
 |
 |