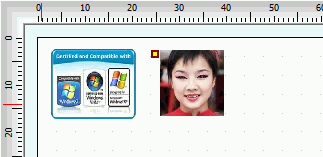
Label Mix HomePage Image or Picture Object


An Image object is used to insert an image/picture (graphics) into your design.
Image objects can be linked to a database so the image is pulled from a database field.
To add an Image object to your label design, do the following:

    1. Select the Object|Image.
    2. Click in the design area at the position where you want to insert the Image.
    3. Specify the source of the image (select and load image from file)

You can specify source of an Image object in two ways:
    a) From a file on your local disk.
    b) From a database field (see notes on pulling Image objects from database)
 
Label's Image and Picture Object


Properties of Image object that can be modified are:
Top Coordinate x from text object insertion point in the current unit of measurement. 
Left Coordinate y from text object insertion point in the current unit unit of measurement. 
Color Border color of the image, if Show Border property is checked. Click on the Color bar to change.
Print Check (mark, tick) the box if you want to print the content of the object in the final label design printout.
Background Fills the background of the object with selected color. Transparent property must be unchecked for the background color property to take effect. By default, the background color is white. Click on the Color bar to change to necessary color.
Transparent Must be unchecked to make the object's background color affective.
FieldName Image objects can be linked to a database so the content is pulled from a database field.
FieldName property is the name of the field from database table, we want to bind the Image object to. Database must be checked (tick, mark) in order to use FieldName. see also: pulling Image objects from database
Database Check (tick, mark) in order to link the Image object to a database table
Width Width of the object
Height Width of the object
Gray Scale If checked, image will be drawn using only colors from gray scale
Angle Angle of inclination. Can be selected from drop-down list of values: 0, 90, 180 and 270 degrees.
Aspect Same as constraint. This helps to automatically calculate and maintain necessary (optimal) proportions of width/height, if we decide to stretch (scale) the image. To avoid distortion, check this item before you stretch the image. see also Helpful notes on manipulating Image object
Autosize Revert (restore) image to its original size.
Locked To disable selection property of the object. To a select a transparent Circle, click on the edge otherwise click on the rectangle. See also: Locked properties
Image Click to select the file on the local disk with the image you want to draw. Supported graphic formats: bmp, jpeg, gif, wmf, ico, emf and png. Default image folder opened is : Label Mix /My Images or Label Mix /My Photo 
Show Border Check to draw a frame around the ImageSee border property.
Pen Width Thickness of the line used for the border.

Helpful notes on manipulating Image object
In order to improve the quality of printout, when manipulating an Image object pay attention to the following:

1. Choose image objects with the resolution of the printer in mind. When displayed on the screen,  image may appear distorted, because the screen's resolution is far less than the printer's resolution. In general, a graphic that is displayed and printed, pixel for pixel, will appear much smaller on the printer. This means that the image must be "stretched" to print with the same dimensions as displayed on the screen. For the best print quality, use graphics that are much larger than the desired size and scale them to the size you desire. This way the graphic will contain enough information to print at the higher printer resolution without having to be stretched.

For instance, if the printer has a resolution of 300 by 300 dpi (as most laser printers do) then a 300 by 300 pixel graphic will print 1 inch by 1 inch at 100% scale. On the screen the same graphic may be larger than the entire design at 100% scale. This program uses a virtual resolution of 100 by 100 dpi screen resolution to provide WYSIWYG formatting, which means that the graphic will require 3 inches by 3 inches. With this in mind, scaling the graphic to occupy 100 by 100 pixels on the screen (1 inch by 1 inch virtual, 33 1/3 % scale) will cause the graphic to be printed at exactly 300 by 300 dpi, utilizing 100% of the printer's resolution capabilities and provide the ultimate print quality! Now this may seem complicated but really it is not. Just try to use graphics that are about the same size when printed 100% scale as the size on the screen you desire.

2. Try to keep the aspect ratio (height / width) of the scaled object the same as the aspect ratio of the unscaled object. If the graphic contains lines with angles angles, changing the aspect ratio could cause the lines to appear distorted. It's always best to maintain the aspect ratio of any graphic object when re-sizing the object.

3. Using graphic file of unsupported format
Image object in Label Mix supports the following graphic formats: bmp, jpeg, gif, wmf, ico, emf and png. To use a graphic file in an unsupported format, you must convert the file to one of the supported formats. The easiest way to do this is to convert the graphic to a bitmap (BMP). Most graphics editors and desktop publishing programs allow you to save a graphic as a bitmap.  

4. Pulling Image objects from database
Before you link Image object to table field and pull the image data from the table, do the following:
1. First link your label design to a table from your database (if you have yet done so)
2. Select and Insert an Image object on the label
3. Load the image from any image file of supported format (even a blank image will do)
4. In the Object properties Inspector, link the image to the Database (select/check the box) and then, from the dropdown list, select the table field (column) containing the image.